Wednesday, September 28, 2011

More Melted Crayon Art


Moderation is something I have never been really good at.  So, once I did the first melted crayon painting I totally wanted to do another.  I have been looking for something fun to put over baby C's dresser, so this is what I came up with.  At first, I was thinking pink, but baby girl's room has gone over-board in the pink department.  So, here is what I cam up with.  First, I painted the canvas a nice blue sky color and let it dry.  After that I picked out all the "grassy" looking crayon colors.  I have to admit I did a first draft of this with generic crayons that I found for $1.  It loked great until I went to melt them with my hairdryer.  It was so wierd, they just would not melt.  Finally, after overheating them, the wax did not drip it just kinda of crumbled. So, my point is that it is worth the extra money to buy the Crayola Crayons, they melt so smoothly. 
Okay, so once you hot glue the various "grassy" colored crayons on, just flip your canvas over and have a blast melting.  I think this is my favorite part.


Lastly, I bought some paper flowers in the scrap-booking section of Michaels.  Wow, they had a ton of pretty flower options.  I went with white flowers, but the possiblies are endless.

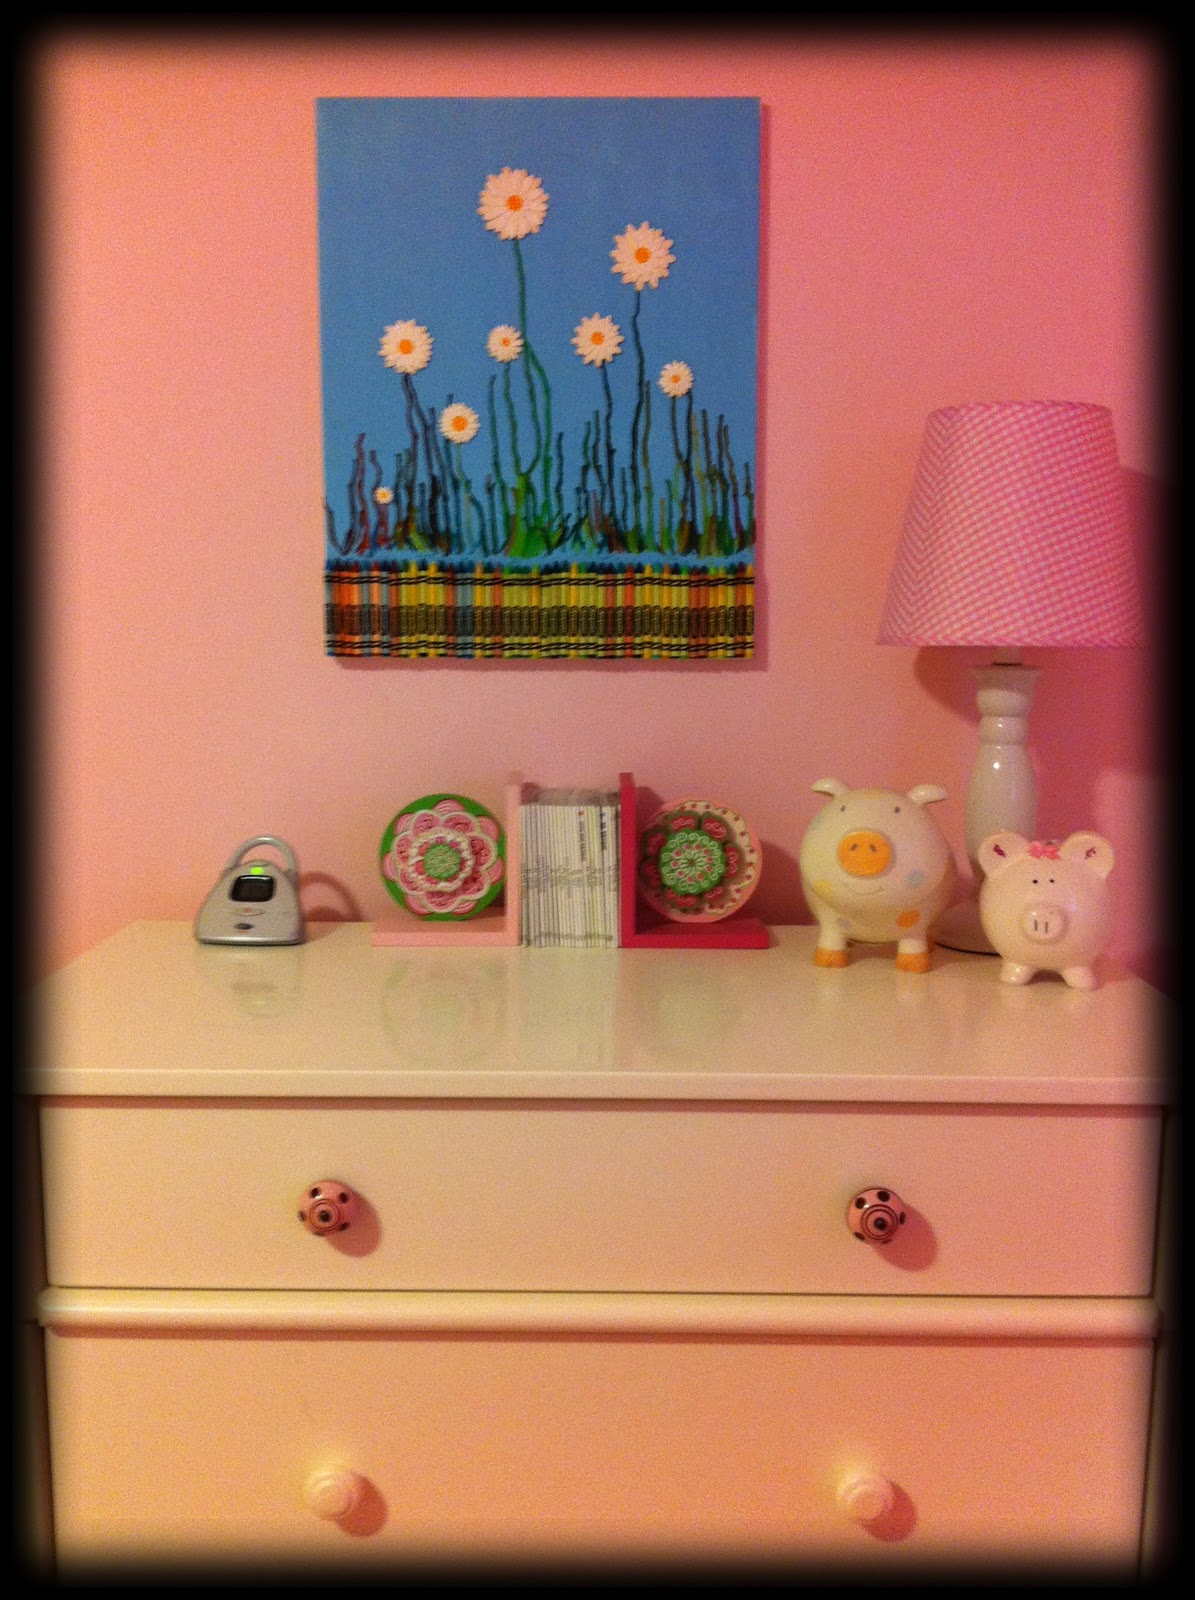
Here, is what it looks like hanging in baby girls room.


Now to come up with something for the boys room, hum.......

Friday, September 23, 2011

Carmel Apple Cake Pops

An Apple a Day Keeps the Doctor Away- this includes apples made out of candy, right?


I have attempted to make the "classic" cake pops preciously three times.  Three times I have ended up with a pile of  mis-shapen, fallen off the stick, gooey messes. So, unless Bakerella  her-self wants to come show me what I am doing wrong, then I have chosen to move on from the classic cake and frosting pops to easier pops.  These Carmel Apple Pops have no Cake, just candy, yum.

Start with Kraft Carmels, Mini Tootsie Rolls, Airheads, and red candy coating. (what, I have no idea why that bag of Caramels is already open)

Next, unwrap the caramels and put about 10 on a plate at a time.  I microwaved them for about 10 seconds until they were slightly soft.  Now, take 2 carmels and roll in your hands to make a ball.  Keep working until you have the number of balls you want.  Next, I patted down each ball and stuck in a popsicle stick.  Now, put the "pops" in the freezer while you prepare the leaves and stems.

To make the leaves, go ahead and microwave a green airhead candy.  I went about 15 seconds here, but as we all know, microwaves will vary.  It should have a mallable consistency.  Now, make pea sized shaped balls and flatten into a leaf shape.  Next, take a knife and score your leaf down the center and sides to give it a more lifelike look.  As, you can see in the pic below they should be pretty small.

I really enjoyed making these leaves, in fact, I am starting to think a of few more projects I could use these for.
Next for the stem. I microwaved a few tootsie rolls.  These needed less than 10 seconds to become workable.  Now, just roll with the palm of you hands and snip into stem size pieces.  Now for the super fun part.  Melt your candy coating and dip each one into the chocolaty goodness.  Tap off the excess.  Unlike cake-pops you can tap these guys pretty hard to get the excess chocolate off.  I can't tell you the number of traditional cake pops I have had fall of the stick at this stage.  I can tell you that they all did end up in my belly:)  Well, not a single caramel fell off the stick.  So tap tap tap away.
While the chocolate is still wet, stick on the leaf and stem.  I put mine in a piece of styrofoam to dry.  It would be super cute to cover the Styrofoam in wrapping paper and a ribbon to serve these.  Or, you could tie a bow around each one like I did in the pic a the top of the post.  Make sure to get your five servings of fruit and veggies a day, ENJOY.

Monday, September 19, 2011

Crayola Crayon Painting

Art fitting of our basement playroom's bathroom
I recently mentioned that I have been spending a ton of time in the bathroom.  No, I do not have digestive issues, I am potty training triplets.  As I am sure anyone who has potty-trained a child can attest to, you spend a lot of time sitting on the bathroom floor during this stage.  In our case, this is sitting in the bathroom waiting for 3, no 2 toddlers to go potty .  Baby B, has yet to actually go on the potty.  Ironically, he is totally into the whole potty concept.  He is our little bathroom attendant.  He likes to bring his brother and sister books, toys, and toilet paper.  He will even flush for you!  Now, I have yet to see him offer anyone a breathe-mint or cologne, but we did have to start a "if you din't make it, then you can not flush it rule", SERIOUSLY!
Anyhow, so the artwork above.  I was sitting in the bathroom, waiting for someone to do there business when I thought , wow, we need some artwork or something to look at in here.  Of course, there is no way I am spending more than about $10 bucks for something to hang in the basement bathroom.  All you need for            
                           
is old crayons, a canvas, glue-gun, and a hair dryer.  I decided to buy a fresh 96 count box of crayons for this (thank you Michael's 40 % off coupon) .  You can arrange the crayons in any order you choose.  I decided against the classic ROY-G-BIV and kinda went with a dark to light thing.  Now, just hot glue these to your canvas.
Last step is to give it a good hair drying.  Be patient with this step and I recommend pointing the dryer towards the tips of the crayons.  I think if I had school aged kids this would be a super fun project to do together.  I am considering doing one with all pink and purple crayons for Baby C's room. Enjoy.

Friday, September 16, 2011

Pimp my ride- toddler edition

Did you know they make spray paint just for plastic? I had no idea, until I went to get additional spray paint for the kitchen chair projects. So I am looking at this spray paint for plastic and my head just starts spinning with ideas and thoughts off all the thing I can do with this. We happen to have,um, a few sad looking plastic toys around here. The triplets love ride on toys, and I have gotten all there ride on toys used.
One, because I like to try to be green (especially when it comes to plastic) but also because I am cheap - no thrifty.

Anyhow, we got our Cosy Coupe from another triplet family that was finished playing with it. It came to us already decorated with stickers and having faded plastic parts. The kids still loved it. But, I figure this spray paint find is an great way to Pimp there Ride (like the M.T.V show).

Last weekend's Michigan football game inspired me to pay homage to my alma mater and "pimp" this out in full Go Blue style.
This photo is pre make-over


Below are the after pics.  I was surprised that this only took about a half a can of spray paint.  We decorated out car with U-M stickers I ordered online.  Between the sticker and paint I spent less than 10 bucks to "pimp" this ride.  The funniest part is when Baby "A" saw it he keep saying "where red car go?".  He actually thinks this is a totally new car.  I have tried explaining that I simply painted it, but he is not having it.  This is his "new car".


So, now I am on the look out for another used Cosy Coupe to paint cream and crimson for daddy's alma mater Indiana University.  And, don't even think of asking -there will be no Ohio State Cosy Coupes in this garage.

Monday, September 12, 2011

Winner Winner Chicken Dinner..... and some apples


Gosh, I love the fall. We had an awesome Sunday morning apple picking.  As soon as I got home with all the apples I got to make some apple sauce, yum.  So, I was looking to make something comforting to go with it for dinner.  I adapted a recipe I saw on-line a few weeks ago.  Let just say- next time I need to make a double batch of this- totally a winner,

Little "packets" of Yummy Chicken
Ingredients-
Cooked Chicken - (I baked 2 chicken breast and cut them up into about 1 inch cubes)
1 cup of cheddar cheese
1 can of crescent rolls (note to self- find a way to "make" crescent roll type dough)
1 can condensed cream of chicken soup.
1 cup of milk

Okay, so first make the soup. No really, actually make the Cream of Chicken soup according to the directions on the package (use the one cup of milk).  I tried the soup and it was quite delicious.  Who knew?  I typically have only used canned soup in recipes, but I kinda wanted to sit down and have a bowl.  Anyhow, next roll out each crescent roll and put a bit of chicken and cheese in each.  Now, here comes the tricky part.... you need to roll these into little "packets".  I lost a filling in the process, but that is okay.  Try to roll this "burrito" styles.  Then, pinch together the edges.  Next place all your little "packets" in a 9x 13 pan, as seen below.


Next, just poor the soup over the chicken.  Please note that in the picture below, my hubby is pouring the soup.  I do not have "man hands"


 If you have any leftover chicken or cheese that did not make it into the "packets" just go ahead and toss it in too.  Now, bake at 350 for 30 minutes until all puffy and yummy.


I served ours with homemade apple sauce that I made in the crockpot.  Yum.


Be on the look out for more apple recipes, did I mention the triplets picked 2 bushels of apples?


Friday, September 9, 2011

Heart Shaped Crayons

I have to give credit to Miss Casey, our babysitter, for this one.  After getting out the crayons for the triplets to color, she noticed all the bits and broken crayons.  She had the triplets help peel paper off the crayons.  Surprisingly, they LOVED doing this and it did keep them busy for a little white.  After peeling the crayons she chopped them up and put them in the molds.  You may remember these $1 molds I got at Target and used for DIY fruit snacks and Hot Cocoa on a stick?   Well, again these came in handy.


Next we filled the molds and baked at 250 for about 10 minutes.  Cool and pop them out.  I love the way these look!

Baby C (the Bean) like coloring with them, but not as much as she LOVES her tinker bell stickers.


Friday, September 2, 2011

"new" kitchen chairs.

A project I have been planing to share is my "new" kitchen chairs. Since having the triplets our kitchen has really taken a beating, especially, our kitchen chairs. The paint on them is peeling off and they are covered in stains. So, we looked at buying a new set, but I just was not ready to spend the money. This is a good set, just needed a freshening up. So, I painted the chairs and love the result! It was so easy to do and really did not take much time.
Anyhow, I posted the results (before and after pics)on Krylon's website. And if you like what I did, please go ahead and vote for me in the contest, thanks,

BEFORE:

AFTER:
Thanks.